Most people who want to do a land subdivision never start. Not because good sites don't exist. They're everywhere. The problem is they don't know how to find them.
They drive past opportunities every day without realising it. Or they fall in love with a site that was never going to work. Or they spend weeks researching a property only to discover a fatal flaw that was visible in five minutes if they'd known where to look.
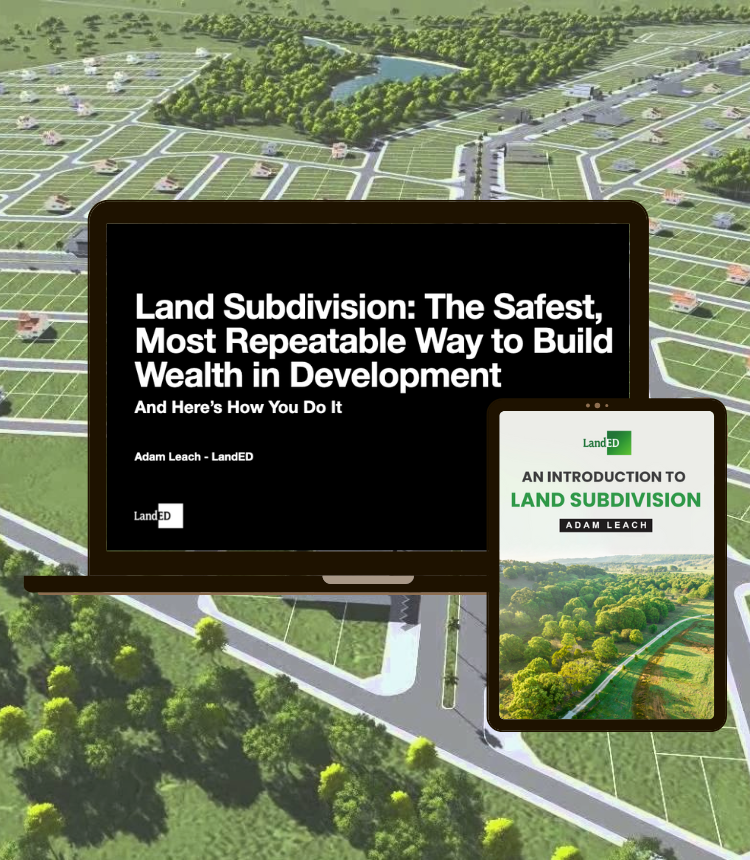
I've personally completed over 30 subdivision projects worth more than $300 million in total value. And the single skill that made the biggest difference to my results wasn't construction knowledge or finance. It was knowing how to find the right site in the first place.
This guide shows you the exact process I use. Every tool mentioned is free. You don't need any software subscriptions, any prior experience, or any special access. Just a laptop and a willingness to learn a new way of looking at property.
By the end of this guide, you'll know how to systematically identify subdivision opportunities across any Australian suburb, eliminate 80% of unsuitable sites in under five minutes, and build a shortlist of genuinely viable opportunities to pursue with confidence.
Why agents won't find your best deals
Here's something most beginners don't understand. The best subdivision opportunities almost never come through real estate agents.
That's not because agents are bad at their jobs. It's because agents are in the business of selling property at the highest price possible, as quickly as possible. They're not looking at a block of land and thinking about what it could become after subdivision. They're thinking about what it's worth today, as-is, to the broadest pool of buyers.
When a site with genuine subdivision potential hits the market through an agent, one of three things tends to happen:
- The price already reflects the development upside, meaning the margin has been squeezed out before you even get there
- It sells quickly to a cashed-up developer who recognises the potential and moves fast
- It gets marketed as a "development opportunity" which attracts a dozen competing buyers and pushes the price up
In every case, you're competing against people with more experience, more capital, and more speed than you. That's a hard way to get your first win.
"The best deals I've ever done were on sites that nobody else had identified as subdivision opportunities. They were hiding in plain sight. You just need to know what to look for."
That's why I teach a proactive search system rather than a reactive one. Instead of waiting for deals to come to you, you go out and find them using publicly available council data, government mapping tools, and market indicators. This puts you ahead of the queue, often before a property is even listed for sale.
Some of my best deals have been sites I approached directly, off-market, after identifying them through the exact process I'm about to show you. The seller had no idea their land had subdivision potential. I offered a fair price. The deal happened quietly, without competition.
What a viable site looks like
Before you start searching, you need to be clear on what a viable subdivision site actually looks like. Not every block of land can be subdivided. And not every block that can be subdivided should be.
Here are the fundamental filters every potential site must pass before it's worth any deeper investigation.
Zoning that allows subdivision
This is the first and most important filter. If the zoning doesn't permit subdivision, nothing else matters. You can't negotiate your way around zoning. You can't "convince" a council to let you subdivide land that isn't zoned for it.
In most Australian states, you're looking for residential zones that allow a minimum lot size small enough to split the existing parcel into two or more compliant lots. The specific zone codes vary significantly by state:
- NSW: R1 General Residential, R2 Low Density Residential, R3 Medium Density Residential
- Victoria: General Residential Zone (GRZ), Neighbourhood Residential Zone (NRZ), Residential Growth Zone (RGZ)
- Queensland: Low Density Residential, Low-Medium Density Residential, Medium Density Residential (exact codes vary by council)
- WA: Residential codes R20, R25, R30, R40 and above
- SA: Suburban Neighbourhood, General Neighbourhood, Urban Neighbourhood zones
Each zone has its own minimum lot size requirements, which you'll find in the council's planning scheme or development control plan.
Sufficient site area and frontage
Every council has minimum lot size requirements. If you've got a 600 square metre block and the minimum lot size is 400 square metres, you can't split it into two compliant lots. Math doesn't care about your enthusiasm.
Frontage matters too. Some councils require a minimum frontage for each new lot, typically between 9 and 15 metres depending on the zone. If the site doesn't have enough frontage for each lot to have adequate street access, you might be looking at a battleaxe configuration (one lot accessed via a driveway through the other), which changes the economics significantly.
A good rule of thumb for a 1-into-2 subdivision: you want a site at least 2.5 times the minimum lot size. That gives you enough margin for driveways, setbacks, and the small losses that come from splitting the land.
Manageable slope and terrain
Flat to gently sloping sites are your friends. Steep sites mean expensive civil works, retaining walls, complex stormwater management, and potentially landslip issues that require specialist geotechnical reports.
That doesn't mean you should never touch a sloping site. But you need to understand that slope adds cost, and cost erodes margin. On steeper sites, you may be looking at an extra $30,000 to $80,000 in civil works compared to a flat equivalent.
Access to services
Every new lot needs connections to water, sewer, stormwater, power, and telecommunications. If these services already run past the front of the property, the connection costs are relatively predictable. You're typically looking at $15,000 to $30,000 per lot in connection costs.
If services don't run to the property, or the nearest connection point is 50 metres away, you could be looking at significant infrastructure extension costs. These can easily add $50,000 to $150,000 to a project and often kill feasibility entirely.
No deal-killing overlays
Overlays are planning layers that sit on top of the base zoning. They can restrict what you're allowed to do, require specialist reports, or make development uneconomical. The main ones to watch for:
- Flood overlays: Usually require habitable floor levels set above flood height, expensive drainage works, or can prevent new dwellings entirely
- Bushfire overlays: Require specific construction standards, defendable space, and specialist bushfire assessments
- Heritage overlays: Can restrict what you can demolish, how new buildings look, and add 6 to 12 months of additional approval processes
- Vegetation or native title overlays: Can require offset planting, prevent tree removal, or add significant environmental assessment costs
I never spend more than five minutes on a site before I know whether it passes or fails these basic filters. If it fails any one of them, I move on immediately. No exceptions. This discipline is what allows you to screen dozens of sites in a single session and only invest real time in the ones that have genuine potential.
Free state-by-state mapping tools
Every Australian state provides free online mapping tools that show zoning, overlays, lot sizes, and planning controls for every property in the state. These are the single most valuable resource for finding subdivision sites, and almost nobody outside the industry knows about them.
In addition to state tools, most individual councils have their own more detailed mapping systems. These often include things the state-level tools miss, like draft planning amendments, local development control plans, and specific overlay details. Always check the local council's mapping tool in addition to the state one.
To find a council's mapping tool, Google the council name plus "interactive mapping" or "planning portal." For example: "Brisbane City Council interactive mapping" or "Moreton Bay Regional Council planning portal."
The 7-step search process
Here's the exact process I use to find subdivision sites. Nothing fancy. Just a methodical, repeatable system that works.
Pick your target area
Start with a suburb or group of suburbs you already know reasonably well. Understand the local market values, housing stock, and demographics. Trying to search everywhere at once is a recipe for going nowhere. Pick one area and go deep. Your first win will come from knowing one market better than most.
Open the council's online mapping tool
Use the state and council tools listed above. Start at the state-level tool to get the overview, then zoom into your target suburb using the council's detailed planning map. Both are free and usually work in any modern browser.
Identify the right zones
Toggle the zoning layer on. Look for the residential zones that permit subdivision in your state. Check the planning scheme for minimum lot sizes in those zones. Write down the minimum lot size because you'll use it in the next step.
Visually scan for oversized lots
Zoom in to individual streets. You're looking for lots that are significantly larger than their neighbours. A 1,200 square metre lot surrounded by 600 square metre lots is an obvious candidate. The tool will show you lot dimensions when you click on a property. Make a list of every lot that's at least 2.5 times the minimum lot size.
Check for deal-killing overlays
For each candidate lot, toggle on the overlay layers: flood, bushfire, heritage, vegetation. If a candidate site has a significant overlay, it doesn't automatically mean you walk away, but it does mean you factor in the extra cost and complexity before proceeding.
Cross-reference with market data
Use realestate.com.au, Domain, or CoreLogic to check what comparable subdivided lots are selling for in the suburb. Look at recent sales of similar-sized vacant lots or newly built homes on similar-sized blocks. This gives you your Gross Realisation Value, the starting point for your feasibility.
Check ownership and sales history
Use your state's land title search or free tools like realestate.com.au's property history. If the site hasn't sold in 20+ years and the owners are likely elderly, it may be a candidate for an off-market approach. If it sold recently at full market value, the current owner probably knows the subdivision potential and is pricing accordingly.
Want to work through this on a real site?
The Master Land Subdivision online course walks you through every step with real examples, downloadable checklists, and Adam's feasibility calculator.
Get the Online Course →Running a quick feasibility
Once you've found a site that passes all the filters, run a quick feasibility check. This isn't a full feasibility study, it's a back-of-envelope calculation that tells you whether the site is worth investigating further.
The calculation has four inputs:
- Gross Realisation Value (GRV): What you'll sell the subdivided lots for, based on recent comparable sales
- Purchase price: What you'll pay for the site
- Subdivision costs: Council fees, civil works, professional fees, finance costs
- Holding costs: Rates, interest, insurance during the project timeline
Gross profit equals GRV minus purchase price minus subdivision costs minus holding costs. Divide gross profit by total costs (purchase price plus all other costs), and that's your margin as a percentage.
We never proceed on a deal unless it shows a minimum 30% margin on costs. That's not a suggestion. It's a hard rule. The 30% buffer is what protects you when reality doesn't match the plan. Because it never does, perfectly. Costs come in higher than expected. Timelines blow out. Sales prices shift. The 30% margin is your safety net.
"If the numbers don't show 30% margin at the back-of-envelope stage, they're not going to magically improve when you dig deeper. Walk away and find the next one. There are always more sites."
For the detailed breakdown of this calculation, including the specific cost assumptions to use for each state, read our guide on The 30% Margin Rule.
Case study: A real site found this way
1-into-2 infill subdivision found using free council tools
One of our students, Cameron, used this exact process to find his first subdivision site in Ormiston, Queensland. He started by pulling up the Redland City Council mapping tool and filtering for Low Density Residential zones with a minimum lot size of 400 square metres.
He identified a 920 square metre block on a quiet street where the surrounding lots were all 450 to 500 square metres. The block had road frontage of 18 metres (enough to split into two 9-metre frontages), flat topography, and all services in the street. No heritage overlay, no flood overlay, no bushfire.
He cross-referenced comparable sales and confirmed that new 460 square metre lots in the area were selling for around $520,000 each. His back-of-envelope feasibility showed a 34% margin on total costs.
He made an offer. It was accepted. He completed the subdivision, built a 4-bed home on each lot, and sold both. The process from identifying the site to settling both finished homes took 18 months. That's how the system works in practice.
Building your shortlist
The goal of this process isn't to find one perfect site. It's to build a shortlist of three to five sites that pass all your filters and show viable feasibility numbers. Then you do deeper due diligence on each one to determine which is genuinely the best opportunity.
I recommend keeping a simple spreadsheet or even a notebook with one row per site. Record these fields for every candidate:
- Property address
- Lot size and frontage
- Zoning and minimum lot size for that zone
- Any overlays present
- Services available
- Estimated end lot values
- Estimated purchase price
- Rough feasibility margin
- Owner details and last sale date (if available)
- Notes on anything unusual
When you've got three to five sites that hit 30% or better on back-of-envelope feasibility, you've got a shortlist worth pursuing. From here, you'd typically engage a town planner for preliminary advice on the top candidates, speak to a surveyor about site-specific constraints, and start thinking about how to make an offer.
The discipline here is important. Don't fall in love with any single site. Don't start imagining the finished product. Stay objective. The numbers tell you whether to proceed, not your gut feeling.
Common traps to avoid
Falling in love before running the numbers
This is the most common mistake. Someone drives past a beautiful corner block and immediately starts imagining what they could do with it. They spend two weeks researching it before they discover the zoning doesn't permit subdivision. Or the numbers don't work. Or there's a flood overlay they didn't notice. Always run the numbers first. Emotion second.
Searching too broadly
Trying to search ten suburbs at once means you won't know any of them well enough to spot opportunities. Pick one or two suburbs. Learn the zoning intimately. Understand the market values. Know the street patterns. Depth beats breadth every time when you're starting out.
Ignoring overlays
An overlay isn't always a deal breaker. But it's always a cost adder. Ignoring overlays because "it probably won't be a problem" is how people end up with feasibility blowouts of $50,000 or more. Check them early. Factor them in. If they push your margin below 30%, move on.
Relying on agents for opportunities
I said this at the start and it's worth repeating. If you're waiting for an agent to call you with a subdivision opportunity, you'll be waiting a long time. Or you'll overpay. Build your own pipeline using the tools and process in this guide.
Skipping the services check
Most council mapping tools don't show underground services clearly. People assume services are available because the neighbours have them, but on some deeper rural-residential blocks, the connection point might be hundreds of metres away. Always confirm services before you proceed beyond back-of-envelope feasibility. A quick call to the council's engineering department usually gets you the answer.
Trusting Google Maps for boundaries
Google Maps is not accurate enough to use for understanding lot boundaries, setbacks, or distances to features. Always use the council's official mapping tool, which is based on cadastral data. The difference can be several metres, which can kill a deal.
Where free tools stop working
Free tools will get you a long way. They'll let you identify viable sites, run back-of-envelope feasibility, and build a shortlist you can approach with confidence. For most first-time subdividers doing a 1-into-2 or 1-into-3 project, free tools are all you need.
But they have limits. Free tools won't give you:
- Detailed flood studies or flood level data beyond the basic overlay
- Bushfire attack level (BAL) calculations
- Professional topographic surveys of the specific site
- Access to paid property research databases like CoreLogic or Pricefinder with full sales history
- Planning scheme amendments currently under draft
For any site you're seriously pursuing beyond back-of-envelope stage, you'll eventually pay for a town planner's preliminary advice (typically $500 to $1,500), a surveyor's initial site assessment (often free as part of a broader scope), and possibly a land title search ($20 to $50 depending on state).
The free tools do the filtering. The paid inputs confirm the winners.
What comes next
This guide covers the "finding" stage. It's the first pillar of the three-pillar framework I teach at LandED: Find, Secure, Execute.
Once you've found a site and confirmed it stacks up at the back-of-envelope level, the next steps are:
- Deeper due diligence, including preliminary planner advice and site-specific constraints
- Structuring a purchase contract with the right conditions to protect your capital
- Engaging the consultant team (surveyor, civil engineer, town planner) in the right order
- Lodging a development application with council
- Managing the construction and titles process through to settlement
If you're new to all of this and want to understand whether you're ready to start looking, the quickest way to find out is to take our free readiness quiz. It gives you a clear picture of where you stand and what your next step should be.
If you've already got some foundations in place and want to work through the full site search process with real tools, real examples, and a step-by-step framework, the Master Land Subdivision online course walks you through everything in detail.
Either way, the most important thing is to start. The sites are out there. You just need to know where to look. And now you do.